Configuring and Verifying Anti-Virus Profile
by Swetha Ragunath
This article will showcase how to configure and verify Versa AV profile.
The VOS antivirus software scans files received or transmitted in live traffic. When the last byte of a file is transmitted, the antivirus software extracts the file and scans it for viruses. If the file contains a virus, the action in the antivirus profile is enforced on the packet or session. If no virus is detected, the last data packet held by the VOS device is forwarded to the destination.
To enable VOS devices to scan files for viruses, you must configure at least one antivirus profile and then associate it with a rule in an NGFW policy. The antivirus profile is then applied to all traffic that matches the policy rule. The VOS software provides predefined antivirus profiles, and you can configure custom antivirus profiles.
The diagram below shows a typical Secure SD-WAN deployment scenario with three branch locations connected in a full-mesh fashion. All configuration and management actions are done through a central single-pane-of-glass console, Versa Director.
Policies can be configured at the template level which then can be published to various sites without needing to configure per device basis.
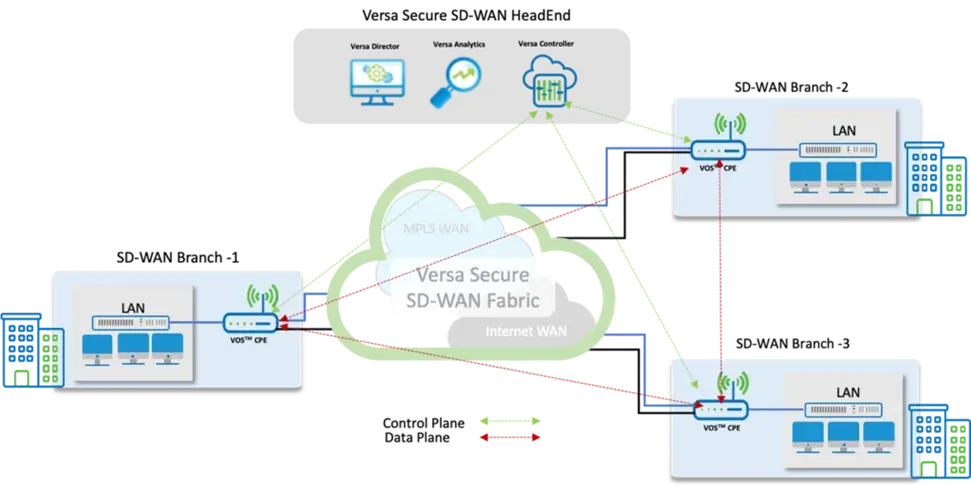
1. High Level Topology
 For this example, we have a SDWAN Branch office with VOSTM CPE appliance with DIA link. To block any malicious file uploads/downloads transiting the CPE appliance, an Anti-Virus profile is configured, and VOS is enabled to apply security profiles for Internet bound traffic.
2. Configuration steps
Objectives:
1. Create an Anti-Virus profile: To define traffic to be inspected and mitigation action
2. Map the AV profile to firewall policy rule
Step 1 : Creating an Antivirus profile
It is important to configure an anti-virus profile before the firewall policy can be configured. It should be noted that an AV profile can be created specific to a CPE or it can be configured at the template level. It’s always recommended to create at template level for the simple reason of reusability and rapid deployment.
The Versa director configuration snippet shows steps to create the AV profile.
– Navigate to Configuration > Services > Next Gen Firewall > Security > Profiles > Antivirus > +Add

– Give a profile name and configure the AV profile as per required use case

[table id=6 /]
Step 2: Map AV profile to a NGFW firewall policy
– Go to Configuration > Services > Next Gen Firewall > Security > Policies > Rules
– Create a new rule for LAN to Internet traffic or edit an existing rule to add the AV profile. In this case, choose Source as LAN-zone.
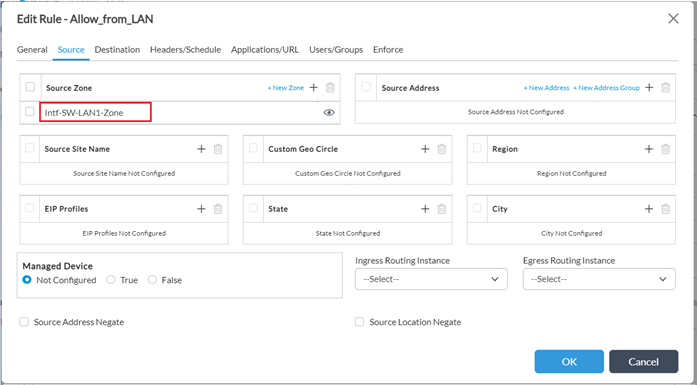
- Under Enforce tab the followings need to be done
- Select “Apply Security Profile”
- Check “Antivirus” under Profiles
- 0From the dropdown menu select the AV Profile created
- In order to log events in Analytics, select “Default-Logging-Profile” under Log tab
- Finish the configuration by clicking OK

3. Verification
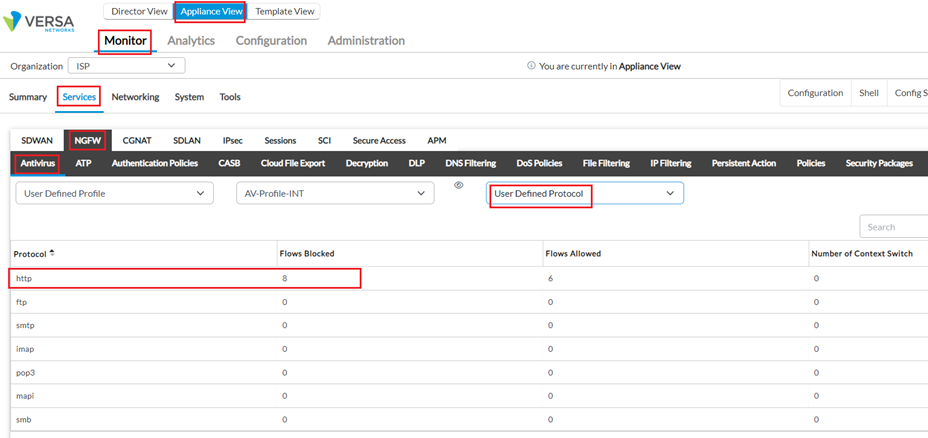
i. Monitor from Appliance Context: Given below stats were taken when a VoS CPE detected Virus effected file being downloaded from the internet and it took action and rejected it.
a. AV Profile hit-counts : Monitor > Device > Services >NGFW > Antivirus > User Defined Profile > Profile-Name > User Defined Statistics
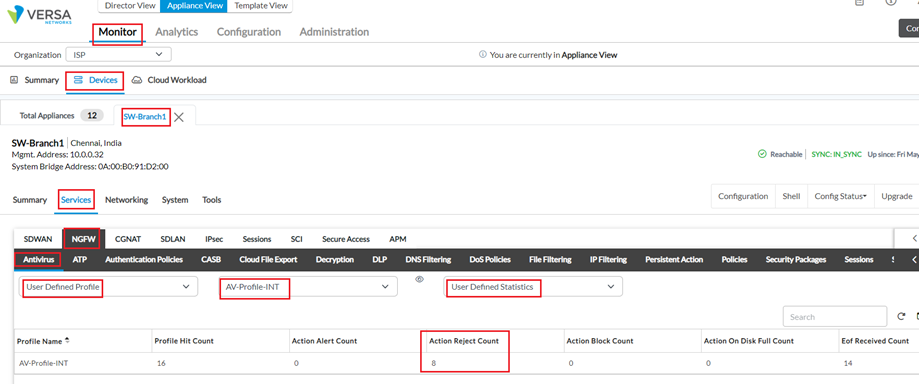
From VOS device cli using below command –

b. AV Protocol hit-counts : Monitor > Device > Services >NGFW > Antivirus > User Defined Profile > Profile-Name > User Defined Protocol
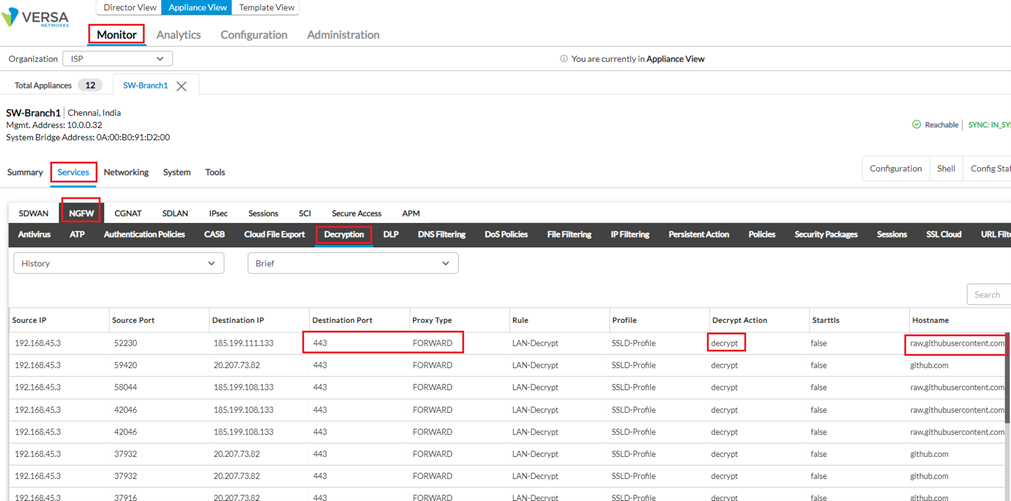
c. SSL Decryption Profile hit-counts : Monitor > Device > Services >NGFW > Decryption > History > Brief
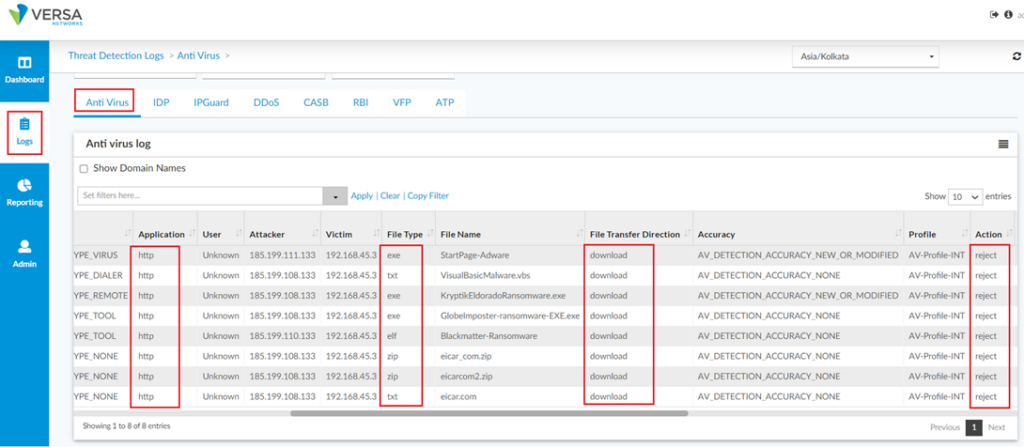
ii. Versa Analytics showing same events
From Dashboard -> Security -> Threats -> Malware :

Detailed session logs can be seen from Logs -> Threat Detection -> AntiVirus :