Destination NAT
Network Address Translation (NAT) is the process of mapping IP addresses belonging to one address space into another.
Destination NAT or popularly referred to as DNAT is a method of transparently changing the destination IP address(:port) of a packet and performs the inverse function for the replies.
DNAT is widely used when you want a service available on a Private DMZ network to be publically accessible – e.g: a WebServer
This article explains how to configure Destination NAT in Versa’s VOS.
1. High Level Topology
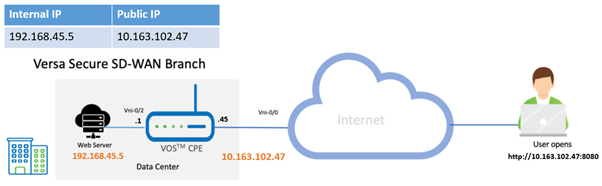
In this topology, we have an external user from the Internet trying to access a WebServer hosted behind a Versa SD-WAN appliance. The user will use the external/Public IP of the WebServer to accessit.
For this example, the gateway VOS CPE is configured to accept connections only on a specific port 8080, while the webserver internally listens on port 80.
Configuration
Objectives:
A. Configure a Destination NAT Pool
B. Configure a Destination NAT rule to match the interesting traffic and apply DNAT
CGNAT is configured from the Configuration > Services Tab > CGNAT.
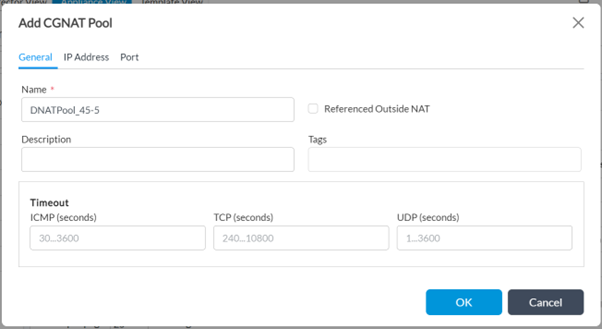
Step 1: Create a new CGNAT Pool
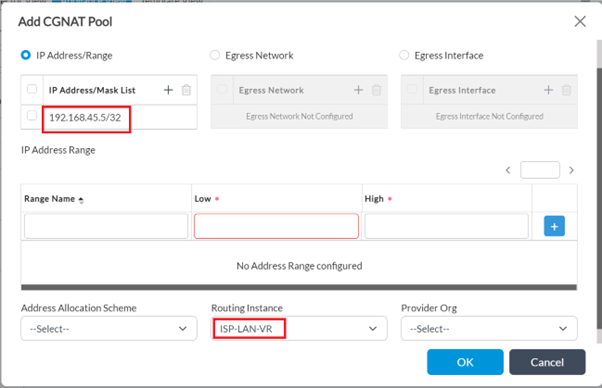
Step 2: Under 'IP Address' tab, configure the internal IP of the host (webserver) '192.168.45.5/32' in 'IP Address/Mask' field and select the routing instance as LAN-VR to indicate the VRF to which the Pool IP belongs, in this case it is 'ISP-LAN-VR'..
In Destination NAT, the CGNAT pool refers to the untranslated IP addresses given to the hosts/servers which reside inside the network DMZ.
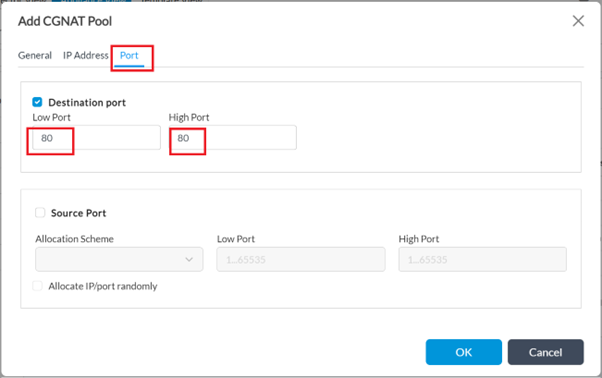
Step 3: Under the 'Port' tab
- Tick the checkbox 'Destination port'
- Give the 'Low' and High 'Port' value as '80' (since the web server in this example listens only on this port)
- Click on OK to create the DNAT pool
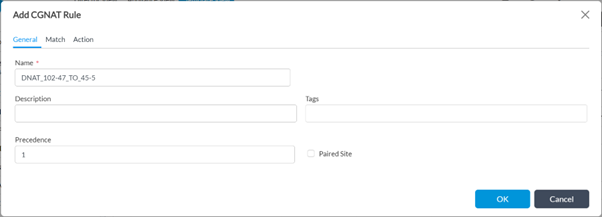
Step 4: Create a new CGNAT Rule: Configuration > Services > CGNAT > Rules > +Add

Give a name for the rule
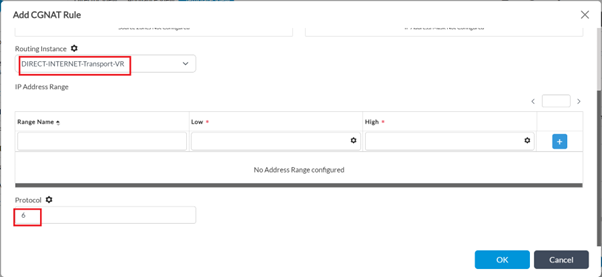
Step 5: Navigate to the 'Match' tab:
- Select routing instance as WAN-Transport VR - 'DIRECT-INTERNET-Transport-VR' in this case
- Protocol as '6' for tcp (optional)
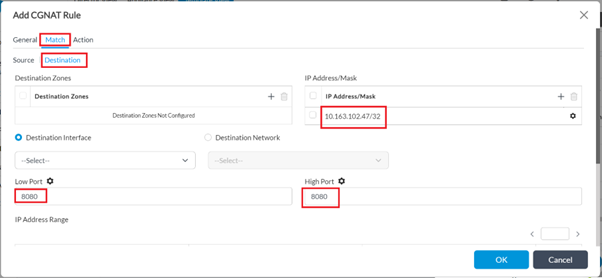
- In 'Destination', configure the Public IP of the WebServer (10.168.102.47/32' in 'IP Address/Mask'. 'Low Port' and 'High Port' as 8080.
The Port Provided here can be different from that which the internal server is actually listening on. Enterprises can use this for additional security.
VOS automatically handles the Port Forwarding.
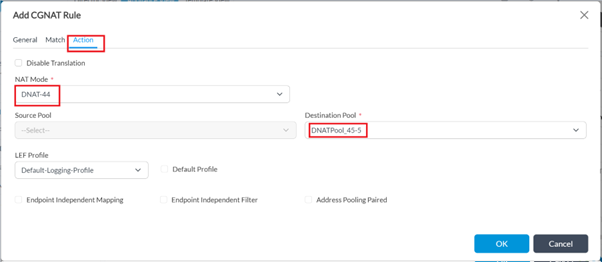
Step 6: Under the 'Action' tab, choose the NAT mode as 'dnat-44' and map the destination pool created in Step 1 here.
Logging can be enabled as desired, to view the sessions in the Analytics logs.
3. Verification
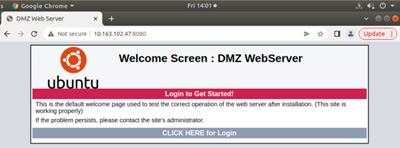
An external user tries to access the WebServer using Webserver Public IP 10.163.102.47 on port 8080-
From the VOS CPE cli, the NAT session shows a remote-user device with a host IP of 10.163.108.33 is accessing https://10.163.102.47:8080, which in turn is translated to 192.168.45.5:80 by the VOS CPE:

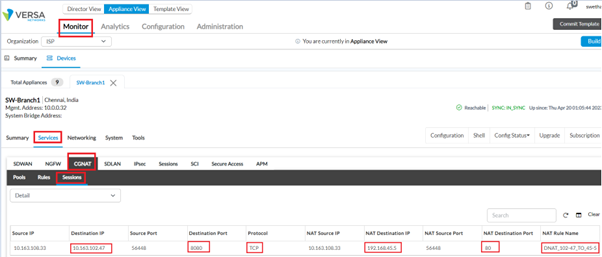
Same from the Versa Director Monitor tab:
Summary
In this article we saw how to configure Destination NAT and verify the logs on CLI.


