Manage Template and Snapshots
Versa Director allows you to take and save the snapshot of a template. When we change and deploy an existing template, a snapshot is taken and saved automatically. Versa Director saves a maximum of ten snapshots for a single template.
We can compare the snapshot of a previous template with the state of the current template and can also restore an old snapshot.
This article explains how to
- Modify a Template
- Compare between current and previous version(s) of a Template
- Restore a previous Template from a Snapshot
- Lock a Template (or) Device
- Apply Template changes to Appliance(s)
- Fixing Appliance Sync Issues
Modify a Template
Here we will look at how to modify a template and merge with existing the existing Template.
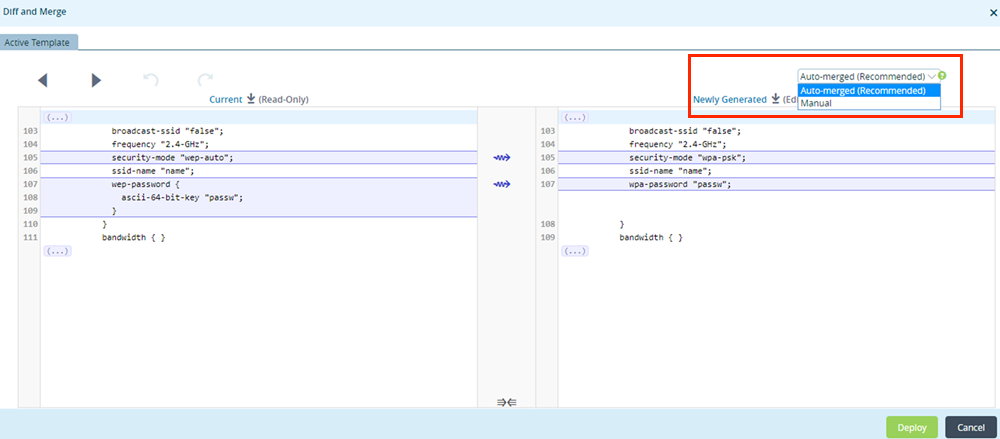
Once the desired changes are made in the Template, click on Recreate. The Diff and Merge window pops up showing the differences between the current and newly generated template.
Choose the ‘Auto-merged‘ to merge the changes and click on Deploy.
Compare between current and previous version(s) of a Template
Here we will look at how to compare and identify the changes between the current and previous versions of the template using snapshots.
To view the templates navigate to Configuration > Templates > Device Templates. It lists out all the templates under the Particular Organisation.
Step 1: Choose the template which you want to view.

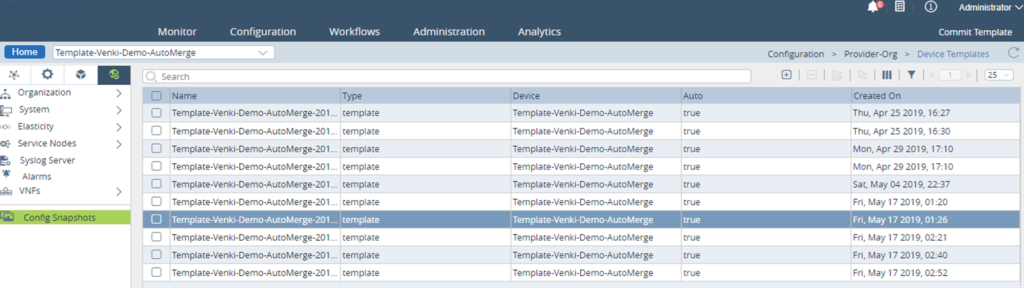
Step 2: Under the 'Others' tab, click on 'Config Snapshots'.
This will list the previous ten versions of the Template along with the date on which they were created.
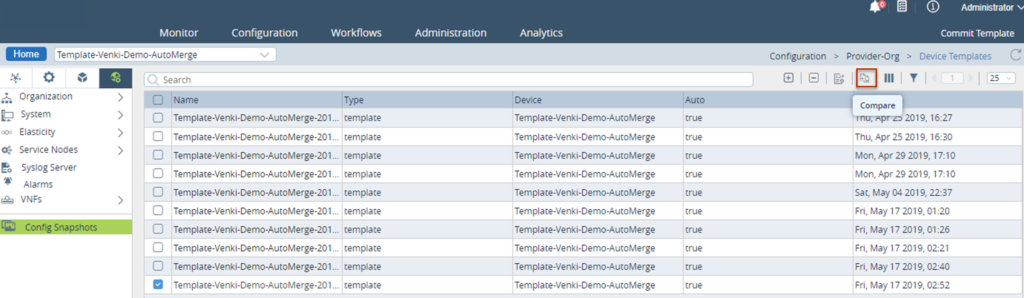
Step 3: Select the version of Template snapshot to compare with the current template and click on 'Compare' icon.
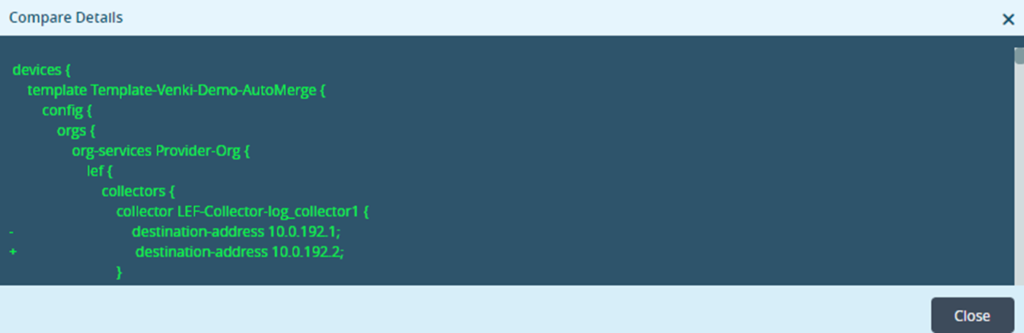
The ‘Compare Details‘ window displays the difference between the two templates – the current template and the snapshot selected. A ‘+‘ (plus) sign indicates configuration that has been added in the current template and a ‘–‘ (minus) sign indicates configuration that has been removed in the current template.
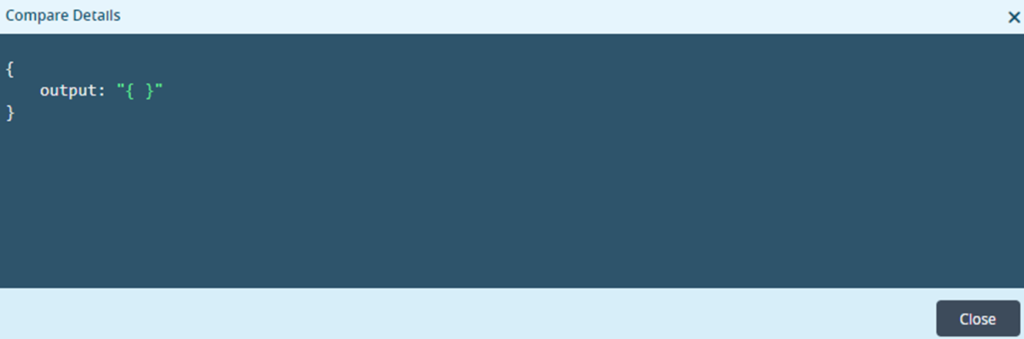
If there was no configuration changes made and a template was recreated, a config compare would show that no changes were made and the Compare Details output would indicate the same.
Restore a previous Template from a Snapshot
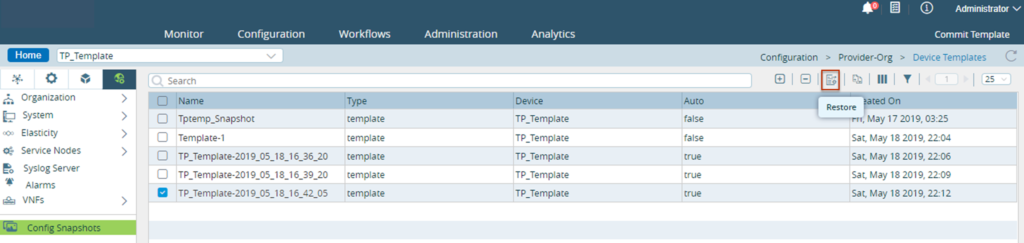
Choose the Template which you want to restore and choose ‘Config Snapshots‘. Choose the version of the template you want to restore with and click on ‘Restore‘ icon.
Lock a Template or Device
Resource locking feature allows you to prevent other users from making changes to the configuration of a resource either inadvertently or until certain activities are completed.
Versa Director allows resource locking at the device and template level. An owner is a user who has locked the resource.
A resource lock consists of two modes:
- All users are locked including the owner—The resource is locked and no change is allowed on the resource. Not even by the owner. This is mostly used when you do not want any change in the system until a critical situation is addressed.
- All users except the owner are locked—You (the resource owner) can make changes but not the others. This is used when you are in the process of making a critical change and do not want other users to make changes that interfere with the resource configuration.
❗️ Resource Locking is persistent and is applicable even on a system restart across user sessions.
Any attempt to apply a template on a locked device is rejected. You cannot modify the contents of the template when it is locked but you can always re-apply the template to a device. This allows the reuse of the template for an application and prevents any changes to the original template.
Step 1: In the Configuration Tab, select the templaet or the device which you want to lock.
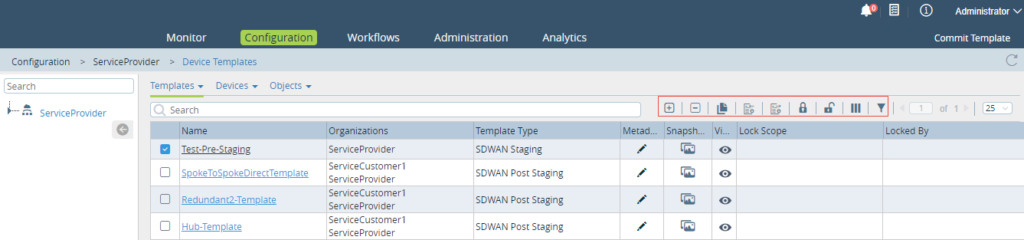
Step 2: After selecting the template choose the lock option.

Step 3: In the Lock Template window, you can choose if you want to lock the Template for all users or
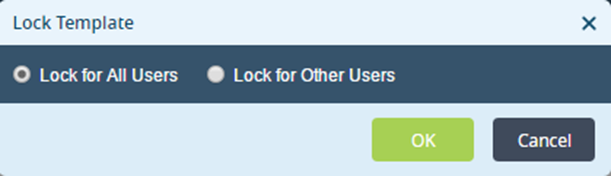
Apply Template changes to Appliance(s)
Any changes made to a Template or a Service Template attached can be committed to the appliances – all associated devices or selected devices using the Commit Template Option.
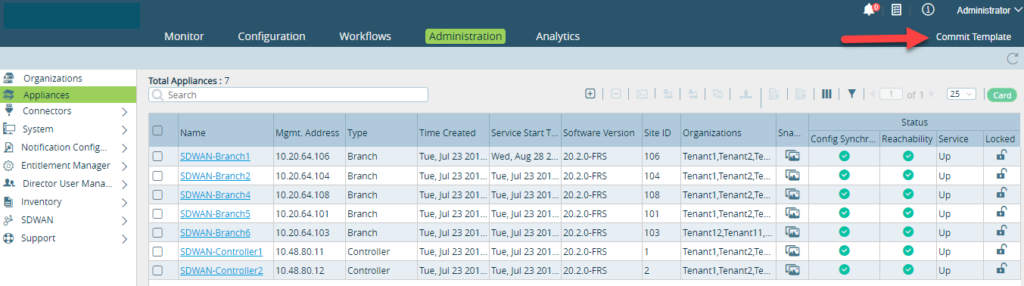
Step 1: In the Director view click on 'Commit Template'
Step 2: In the Commit popup window
- Choose the Organization
- Select if it is a 'Template' (Device Template) or a 'Service Template'
- Select the appropriate Template
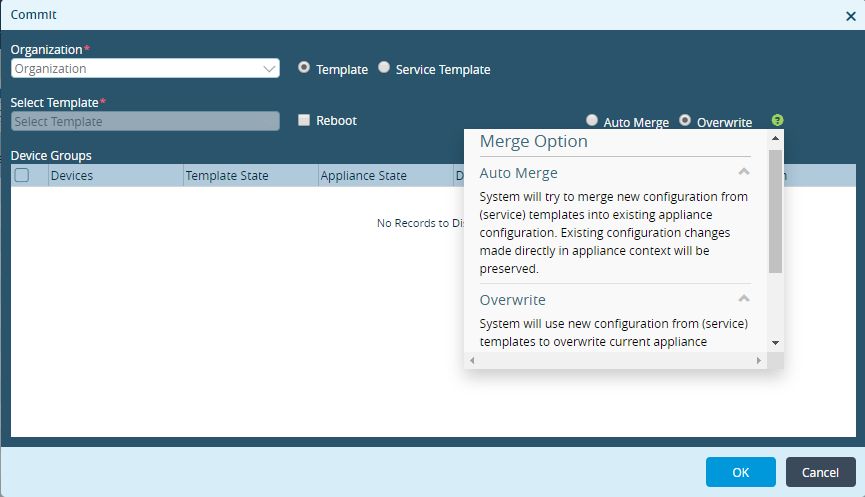
There are two Commit options you can choose from
| Auto Merge | The system will try to merge the new configuration from the Template into the existing appliance configuration. If any appliance level configuration changes are done, then they will over-ride the new configuration and the existing appliance context is preserved. |
| Overwrite | The system will use the new configuration from the Template and overwrite the existing configuration on the appliance. This option will override all appliance level changes. |
Step 3: Once we choose the Template, it will list all the appliances associated with it. Choose either one of 'Auto Merge' or 'Overwrite'
'Reboot' is not required for all template commits.
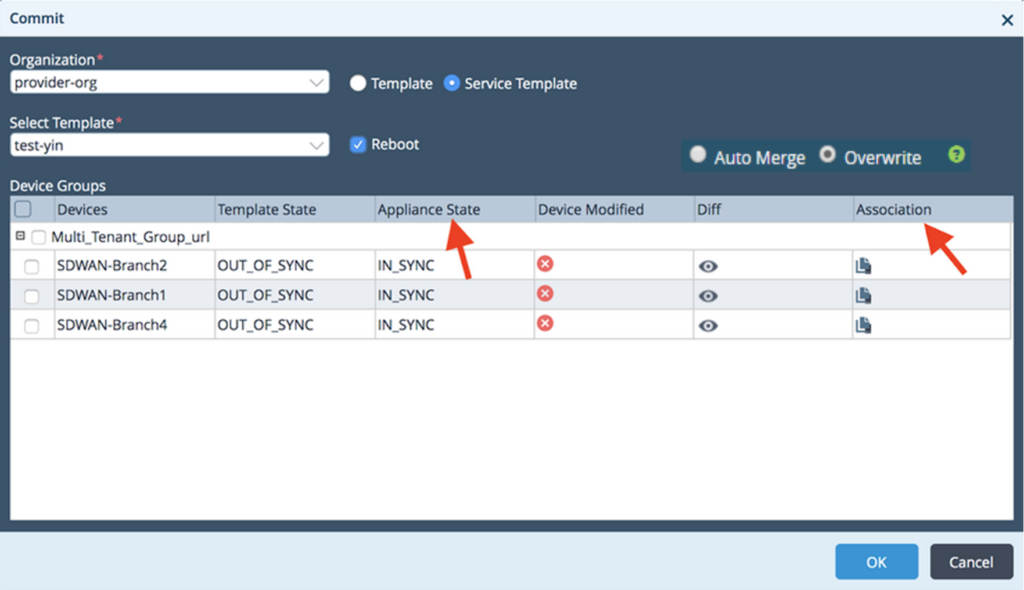
The Appliance State has to be ‘IN_SYNC‘ with the Director before committing the changes. If it is not we have to first fix ‘OUT_OF_SYNC‘ appliances.
Fixing Appliance State SYNC issues
If a VOS CPE is out of sync, there is an ‘x’ mark indicating the same. In this case, we will have to sync the appliance before committing the changes.
There are two Sync options,
– ‘Sync To‘ – Applies the Configuration available on the Director to the Appliance
– ‘Sync From‘ – Applies the Configuration available on the Box to that on the Director and Syncs the appliance

Once the Sync is complete, click on the ‘Diff‘ icon and we see that there are differences in the Configuration of the Appliance and the Template. The template changes to ‘IN_SYNC‘ to indicate that the device has been modified successfully.
Summary
In this article we saw the different options available in Versa SD-WAN to manage the Templates and Device Configurations. These options give the user options to roll back to last know good configuration quickly in case of a configuration error.

